
A Quick Definition: Joist sistering is the process of attaching a new joist alongside an existing joist to strengthen and restore your floor’s structural integrity. This technique involves securing a sister joist parallel to the original joist using carriage bolts, construction adhesive, and proper fasteners. The process reinforces weakened floor joists without requiring complete replacement, making it a cost-effective solution for many structural problems.
Understanding when and how sistering works can help you identify potential issues early and make informed decisions about your home’s foundation health. This guide covers everything you need to know about joist sistering, from recognizing problems to understanding the repair process.
Understanding Your Floor System
Before getting into sistering techniques, it helps to understand how your floor framing actually works. Your floor is a connected system of parts that share the job of holding up your home’s weight.
Basic Floor Components
A floor joist is a horizontal wooden beam that spans between support points to carry the load of your floors, furniture, and the people walking on them. These structural members run parallel to one another at regular spacing, usually 16 or 24 inches apart, as set by your local building code.
The sill plate sits on top of your foundation wall and gives the floor framing its base connection point. Resting on that sill plate, the band joist (also called a rim joist) runs perpendicular to the floor joists around the perimeter, closing off the floor system and adding stability. The sill plate must stay level and secure because every joist above it depends on that connection.
Support Systems
Your joist system ties into several other parts that share the load:
- A strong beam provides major support points where joists rest or connect
- Joist hangers secure joists to beams and to the band joist
- A support column carries the load from the beams down to the foundation
- Band boards enclose the floor framing at the perimeter
- A deck joist extends the system to outdoor areas
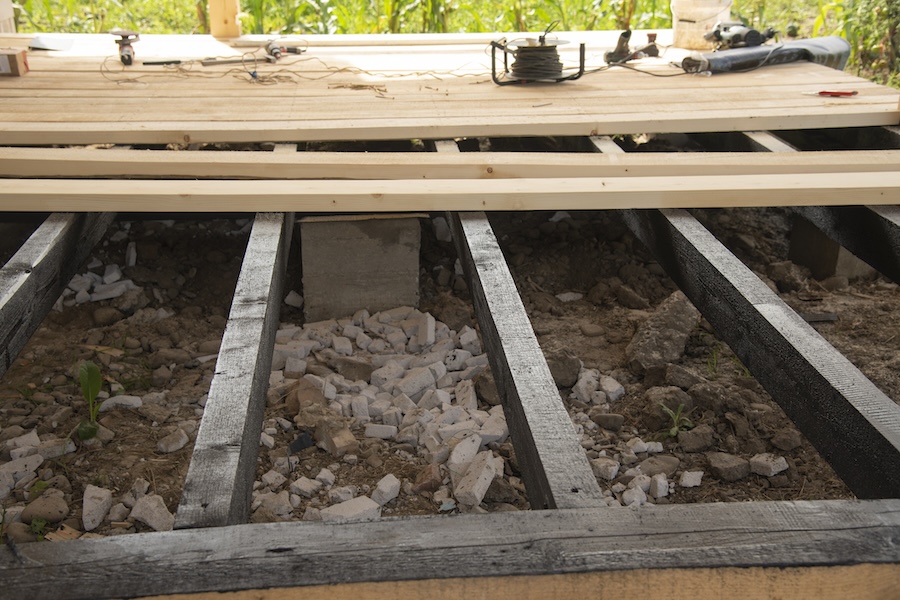
The crawl space below your floors houses all these components and gives crews access for maintenance and repairs. A span table tells builders the maximum distance a given joist size can cover based on expected loads, which is why spacing and sizing matter so much.
When any part of this system weakens, the whole floor feels it. If a support column settles or a beam sags, every connected joist starts to show stress, and that’s often when sistering joists become the practical fix.
When and Why Joists Need Sistering
Several things can compromise a floor joist over time. Catching these issues early helps you avoid a larger structural problem down the road.
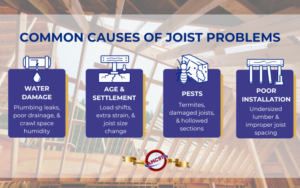
Common Causes of Joist Problems
Water damage
This is one of the most frequent reasons joists fail. Moisture from plumbing leaks, poor drainage, or high crawl space humidity weakens wood fibers and invites rot. Older homes often show water damage where moisture control was an afterthought during construction.
Age & Settlement
As a house settles, the load shifts and puts extra strain on certain joists. The original joist may have been sized correctly when the home was built, but it no longer handles today’s demands.
Pests
Termites and other pests can hollow out large sections of wood. Even after the infestation is treated, a damaged joist has lost much of its load-bearing capacity and won’t recover on its own.
Poor Installation
Undersized lumber, joists spaced too far apart, or weak connections can lead to a sagging floor early in a home’s life. A heavy load the framing was never designed for, such as a new wood stove or a tile floor, can have the same effect.
Recognizing the Signs
A sagging floor is usually the first thing homeowners notice. You might feel a bouncy or spongy spot when you cross the room, and that flex is a form of deflection, meaning the joist is bending more than it should under load.
A quick look in the crawl space can reveal more:
- Joists that bow downward between support points
- Cracks or splits running along the wood
- Visible rot, soft spots, or insect tunneling
- Loose connections at joist hangers or beam attachments
Sometimes a single joist is the culprit while its neighbors stay sound. Other times, widespread water damage means several joists need attention at once.
Either way, these problems never get better on their own. They always worsen, and the longer you wait, the more you’ll pay.
The Complete Joist Sistering Process
Professional joist repair takes careful planning, the right materials, and precise installation. Knowing what’s involved explains why this is work for experienced crews.
Materials and Preparation
A structural engineer should evaluate the situation first. This assessment sets the correct size for the new joist and flags any extra support the floor needs to regain full shear strength.
Material selection depends on the existing joist dimensions and your building code:
- New lumber for the sister joist, matching or exceeding the original joist size
- Carriage bolts for the primary connection between old and new joists
- Construction adhesive to strengthen the bond between the two faces
- Lag bolts or structural screws for additional fastening
- Common nails to tie connections into adjacent framing
Installation Steps
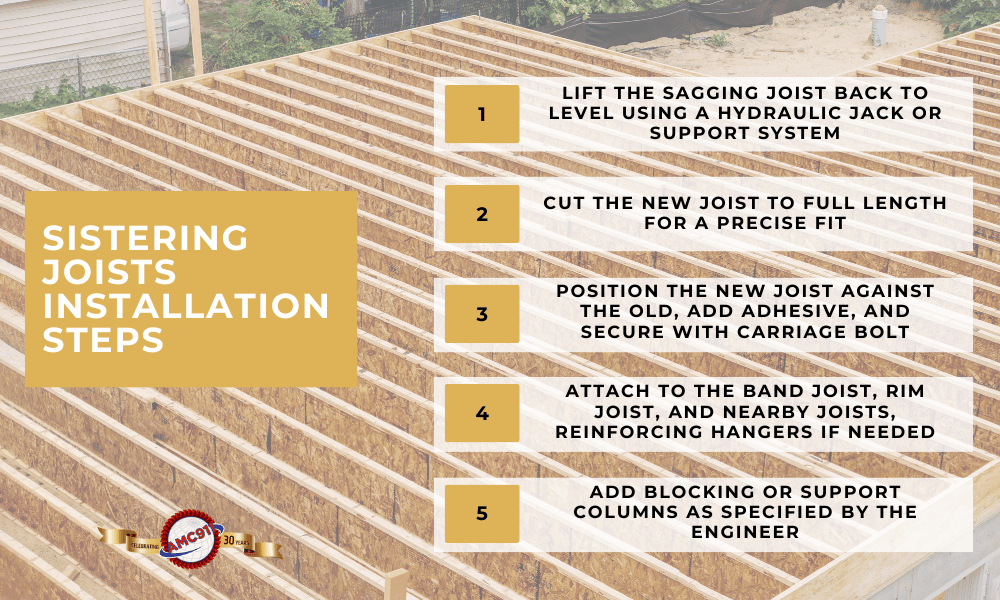
- Structural Support: Before adding a sister joist, crews use a hydraulic jack to lift the sagging area back to level. This relieves stress on the existing joist and sets up proper alignment.
- Measuring and Cutting: The new joist is cut to full length so it matches the span of the original joist. Precise measurements ensure a tight fit against the existing floor joist and clean connections at the sill plate and band joist.
- Positioning and Fastening: The sister joist is pressed tight against the original. Crews spread construction adhesive between the surfaces, then secure the pair with carriage bolts spaced to the engineer’s specs. A nail gun speeds up the connections to the surrounding framing.
- Connections: Proper attachment to the band joist, rim joist, and any adjacent joist takes real attention. Joist hangers may need replacement or reinforcement to handle the added load.
- Additional Support: Some jobs require solid blocking between joists or new support columns underneath. This is all spelled out in the structural engineer’s plans, which specify these requirements.
Code Compliance and Permits
Most areas require a building permit for structural work like sistering. The repair has to meet the current building code, which is often stricter than the code in force when your home was built. Professional contractors know these rules and arrange the inspections that confirm the work meets the standard.
Common Questions During Joint Sistering
How Long Does It Take To Sister a Joist?
The time required depends on joist size, condition, and project complexity. Simple projects with small joists may take a few hours, while larger or more complex jobs can take most of a day. Sistering must be done with precision to ensure proper alignment and support.
How Much Does Joist Sistering Cost?
Costs vary by lumber type, joist length, and damage severity. On average, plan for $100 to $300 per joist for materials. Extensive rot or added bearing point supports raise the figure. It isn’t cheap, but a sistered joist extends the life of your floor framing and helps you avoid bigger repairs later.
What About DIY Joist Sistering?
This is not a weekend project. Bolt spacing, glue placement, and the bearing point at each end all affect whether the repair holds. Only licensed, experienced contractors should handle joist sistering to guarantee safety and proper support.
Professional Solutions and When to Call Experts
Joist sistering takes knowledge and field experience well beyond typical DIY skills. A botched repair can affect your entire home’s structural integrity.
Signs You Need Crawl Space Help
Call an expert if you notice any of these in or above your crawl space:
- Sagging or uneven floors: Weak joists may be bending
- Shaking furniture: Points to failing wood supports
- Musty odors: Often a sign of hidden moisture or mold
- Sticking doors or windows: A clue that supports are shifting
- Cracked walls: Can stem from structural movement below
If you notice anything that strikes you as suspicious, don’t wait to have it checked.
Why Professional Expertise Matters
Our in-house structural engineers bring the technical knowledge to assess joist problems correctly and design the right fix. They understand load calculations, building codes, and how each repair method affects the structure as a whole.
Experienced crews add hands-on skills with installation and material selection. They know how to work safely in tight crawl spaces and handle the surprises that structural work tends to uncover.
The AMC911 Advantage
At AMC911 Crawl Space & Foundation Repair, we’re a family-owned, locally operated company that has spent over 30 years delivering engineered solutions throughout Virginia Beach, Chesapeake, Norfolk, Suffolk, and Hampton Roads, Virginia. With an A+ BBB rating and our own engineering team in-house, we handle the inspection, the design, and the repair under one roof
A joist problem often signals a broader crawl space issue, so our evaluation looks at the whole picture rather than one symptom. Proper sistering restores your floor’s load-bearing capacity and stops the kind of progressive damage that turns a small fix into a major one.
Don’t wait to contact a foundation repair professional. Foundation problems never get better; they always worsen, and the sooner you act, the more you’ll save. Contact AMC911 today to schedule a free inspection. Our experts will give you a clear assessment and honest options for restoring your home.